Talon
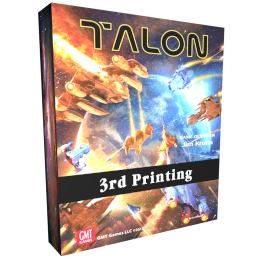 Talon is a tactical game of space fleet combat between the Terran Confederation and the invading Talonthincanthanadu (Talon) Empire.
Long hampered by cost and beset by international problems, real
space exploration did not seem possible for humanity. Amazing
technological breakthroughs would change all of that in the year
2112. The invention of the Near Faster Than Light (NFTL) drive
would make it possible for large ships to move easily in and out of
a planet's gravity well, and to travel quickly within the confines of
a solar system. Ten years later, the perfecting of Faster Than Light
(FTL) drive would turn the galaxy into an open canvas. United by
a common purpose, the newly formed Terran Confederation began
to paint their picture.
Expansion led to colonies, research stations, and even more technological
discoveries, but it also led to the realization that they were
not alone. Although no sentient alien species had been encountered,
long range scanners had picked up the distinctive signatures of FTL
drives. Sentient races must exist… and they must be space faring.
Terran expansion stopped.
Not knowing what to expect, a period of consolidation followed
which emphasized defensive technologies and fleet building. First
contact was made by the people of Earth with this unknown race in
2227. Over time, they would eventually call these other-worlders
the Talon. It was a shortening of the alien sounds that made up their
name but it was also oddly prophetic—the Talon Empire swooped
in very much like a raptor upon the fledgling Terran Confederation.
Number of players: 1 - 2
Game duration: 31 mn
Complexity: 3 / 5
Play Talon and 1250 other games online.
No download necessary - play directly from your web browser.
With your friends and thousands of players from the whole world.
Free.
Play Talon and 1250 other games online.
No download necessary - play directly from your web browser.
With your friends and thousands of players from the whole world.
Free.

Rules summary
1. Impulse Phase
Follow the following steps for one impulse. Do this for each impulse A to F (each side taking turns within each impulse).
1.1 Impulse – Initiative player
The player with initiative, does the following – one ship at a time:
1.1.1 Housekeeping
If you have any shield reinforcement chits on your ship matching the current impulse, remove them.
1.1.2 Available Power (AP)
Check to see if your ship receives available power (leftmost digit on Power Curve matches any digit in impulse box). If you received AP (or have a charged battery – if your ship has a battery), you can do any one of the following:
- Defend initiative – You can allocate the AP to try to prevent an initiative change. Put a chit on your ship to show this.
- Change initiative – You can allocate the AP to try to change the initiative. Put a chit on your ship to show this.
- Charge a yellow box –You may charge ONE yellow box in ONE Weapons “Charge Bar” (but not a red box). Mark the box to show this.
- Charge a battery – If your ship has an uncharged battery, you many charge it with the AP. Mark the battery to show this.
- Reinforce a shield arc – You may reinforce any of your shields by 1 point (even if that shield is destroyed). No more than 2 shield reinforcements may be active at a time. Also, can’t be used if shields are down due to a critical hit. Put a shield reinforcement chit on your ship on the reinforced shield with the current impulse letter to show this.
- Enable a slide slip – You may enable your ship to slip sideways (but not turn) when it moves its next movement point. Put a slide slip chit on your ship to show this.
- Power through a turn – You may enable your ship to turn sooner by using the AP to reduce the ship’s current turning radius by one. Move the turning radius marker one closer to the ship (or remove it if it is only 1 hex a way) to show this. If you are instead using the “numbered turn radius marker” on the ship, reduce the marker by 1 (or remove if the current marker is already a 1).
- Select new missile targets – If your missile launcher is facing your launched missiles, you may change their target.
- Do nothing – You are not required to spend any AP received – but it’s not a good idea to waste it.
AP notes
- 1 AP per impulse - Only one AP can be received per impulse. So, if you have a charged battery, you can either use any AP normally received in the impulse (if any) or the AP from the battery – not both.
- Battery - If you receive the AP from a battery, clear the mark from the battery to show that the battery is discharged.
1.1.3 Movement
Move your ships in any order. Check to see if your ship receives a movement point (middle digit on Power Curve matches any digit in impulse box). If you received a movement point you MUST move your ships one MP. When you move, you may move in any of the following ways (subject to certain restrictions):
- Move 1 hex straight – Move one hex straight ahead. If you have a turn radius chit present, remove if you move on top of it. Or, if using “on ship” chit, reduce number by 1 & eliminate if the number goes to 0.
- Turn – If you have no movement radius chit present, you may turn. To do this, rotate the ship 60° right or left & then move 1 hex straight. Next, place a turn radius chit on the board equal to your ship’s turning radius from the Power Curve (IE. rightmost digit on Power Curve). You place an unnumbered chit that many hexes ahead of the ship. Alternately, put a numbered turning chit ON your ship equal to the turning radius on the Power Curve.
- Sideslip – If you have a sideslip chit on your ship, you may optionally move the ship sideways to the right or left and then forward 1 hex. Regardless of whether you choose to sideslip or just move straight, remove the sideslip chit from your ship.
Movement complications:
- Collisions
- With enemy ships – no effect. You may be in hexes with enemy ships with no damage to either side.
- With your own ships – Each co-resident ship takes 3 damage on the side of each ship that would be facing the other when the collision occurred.
- Floating map
- Ships - If ships get too far apart so that a ship would move off the map, shift all ships over so this does not happen. If this is impossible, add the 2nd map to make room. If this is still not enough room, any ship on the edge that is 6 or move hexes from any other ship is considered to have “retreated” and is out of the game. Then do any shifting of ships desired.
- Terrain – Treat map terrain like ships. If any terrain is too close to the edge and cannot be shifted, remove any terrain 6 or more hexes from any ships and then shift. This terrain is permanently out of the game.
- Afterburner – If your ship has one or more Afterburner boxes, you may use this ability once per game per Afterburner box. You may only use this in an impulse where you would NOT be given a movement factor. Simply mark off the box and move normally – whether straight or, if possible, doing a turn.
1.1.4 Firing (May be done even if no AP or movement in a specific impulse)
Fire weapons for your ships in any order. However, all weapons on one ship must be fired before going to the next. Use the following procedure to fire – for any weapons with a FULL charge bar (all red & yellow cells marked):
- Discharge charge bar – Do this for the entire weapons group. Whether one or all weapons in a group fire, all are discharged.
- Fire each weapon in the weapons group – Do the following for each weapon within a weapon group (and each weapon can have a different target):
- Determine target – Determine if you have any enemy ships in range of a particular charged weapon and also within that weapon’s arc. (The little triangle mark on the weapon icons indicate which arc the weapon can fire into). Below is a diagram of the Shield Arcs (also rules – section 5.3 or back of Talon Combat Tables card) .
- Determine damage – Roll 1 die and index with range for the specific weapon type being used to determine damage.
- Apply damage – Apply damage to the Shield Arc hit on the target ship. (Target shield hit is the shield arc from which the target would fire back at the firing ship if it could). One point of damage destroys one shield or shield reinforcement chit. Once all shield boxes are gone, one point of damage destroys one hull box.
- Damage effects:
- Damage to shields only reduce the # of remaining boxes.
- Damage to hull boxes with no number in leftmost remaining hull box only reduce the # of remaining hull boxes.
- Damage to hull boxes with a number (always a “negative” number) in leftmost remaining hull box reduce the AP # of the ship’s Power Curve during the Power Phase of the round.
- Damage to orange hull boxes (besides any numbers present to the leftmost hull box after that) cause a critical hit. Roll on the Critical Damage Table. Follow the instructions for the critical damage including placement of damage chits or destruction of various ship systems. Sometimes this will cause cascading damage which will destroy the ship.
Firing notes:
- Firing obstructions – Other ships do not obstruct fire. Planets can obstruct fire if a straight edge from the center of the firing ship to the target ship touches the planet. (Rules section 17.2.2).
- Ship explosion collateral damage – If a ship explodes, it causes the following damage to all ships around it:
- Same hex combat – No firing allowed between ships or against missiles in the same hex.
- Missile firing (Rules section 13) – Missiles cause 2 damage each when they hit. Here is how to fire, move, control them:
- Fire - Fire them like any other weapon system but put the missiles in front of the missile launcher arc on a hex adjacent to the ship.
- Target - Mark the target ship or otherwise put a marker on it with the missile IDs targeting it.
- Move - Missiles move every impulse and have a turn radius of 0. Missiles have no AP & cannot side-slip. You must move a missile to its target by the shortest path – but you may choose between equal distance paths.
- Re-target - You can change a missile’s target in the AP phase if your missile battery is facing the missiles you fired. If the retargeted missile is in the same hex as the new target, it will immediately detonate – randomly decide which ship shield it hits.
- Firing at missiles - Missiles can be fired at and destroyed with 3 pts of damage. If 1 or 2 pts damage, flip it over & another hit will destroy it. If missiles are hit with damage due to an exploding ship, only one missile takes damage. Damaged missiles still cause 2 points of damage when they hit.
- Same hex - Missiles can co-reside with other ships or missiles w/ no effect & won’t detonate until they reach their target. However, if the target ship moves into the missile’s hex, the missile will explode
• Ships in same hex – Unfortunate neighboring ships receive the exploding ship’s Explosion Rating + 1 in damage. See the ship profile tables for the ship’s explosion rating. Randomly determine which shield arc in the target receives the damage.
• Ships in adjacent hexes – Each neighboring ship receives the ship’s Explosion Rating in damage. The target receives the damage on the shield arc facing the exploding ship.
1.1.5 Critical Damage Repair
You may attempt to repair critical damage that is repairable (the ⚅ è @ repair icon) by rolling 1 die. If you roll a 6, the damage is repaired.
- Once per impulse – You may attempt to fix one critical damage at the end of each of your impulses – even if you do not get AP, movement, or anything else. (See “Critical Damage Table (8.5)” for which critical hits have the repair icon).
- No immediate repair attempt – You many not attempt a repair in the same impulse you received the critical hit.
1.2 Impulse – mid housekeeping
Move the impulse marker from the “Initiative Player” box to the “Second Player” box. DO NOT flip the initiative marker over.
1.3 Impulse – Non-initiative player (aka “Second Player”)
The player without initiative does the same steps as the initiative player – once per impulse.
1.4 Impulse – end housekeeping
- Determine next impulse initiative (Rules section 4.2) – If the non-initiative player has more “Initiative Change” chits on ships than the initiative player has “Initiative Defend” chits, the non-initiative player gets to determine the next impulse initiative. Otherwise the initiative player gets to determine the next initiative player. Whichever player chooses initiative may do the following:
- Take/keep initiative – The player may be the initiative player next impulse.
- Give initiative – The player may force the other player to be the initiative player.
- Remove initiative chits – If there are any initiative change or defend markers on any ships, remove them.
- Move impulse marker (Rules section 4.1) – Move the impulse marker from the “Second Player” box of the current impulse to the “Initiative Player” box of the next initiative. Also, flip the marker to whichever side has initiative – Human or Talon. (Use the marker side that is NOT you if you are playing the AI and the AI has initiative).
Repeat 4.1 through 4.4 until impulses A through F are complete.
1.5 Power Phase
After all impulses (A through F) are complete, players do some ship housekeeping starting with the initiative player & and then the non-initiative player following.
- Charge weapons – Charge yellow & red boxes in each weapon’s charge bar.
- Yellow boxes – For each weapon in a weapons group, you may charge (mark) one yellow box in the charge bar.
- Red boxes – Alternately, you may charge (mark) one red box in a weapon’s group charge bar.
- Adjust Power Curve – You may either leave your Power Curve the same or adjust it (write a new Power Curve on the ship) according to the following rules:
- Max change of 1 movement – You may only increase or decrease your Power Curve by 1 movement (IE. the middle Power Curve number). If you make this change, use the new Power Curve on the ship description for the new speed. (If a turn radius marker for the ship is currently on the board, it stays there).
- Hull damage effects – After you change your Power Curve, reduce the AP value (leftmost Power Curve number) by the amount of the ship’s leftmost uncovered hull box (if any number is in that hull box). If this would cause you to have a Power number < 0, you are destroyed.
- Power Loss critical damage – If you have this critical damage, you may NOT change your Power Curve until it is repaired. Also, you receive no AP in any impulse until repaired and may not charge any weapons. However, you must still change the Power number in your current Power Curve if hull damage dictates this. Once again, if this causes you to have a Power number < 0, you are destroyed.
2. End round
Move the round marker to the next round on the round track. If the round marker is already on round 10, move the round marker to round 1. Then go back to section 4 of this synopsis (Impulse Phase) and start the next round.
3. End of game
See the Play Book for determination of victory for each specific scenario. Generally, there is no round maximum for any scenario. Ships fight until one side is destroyed or has retreated (see Retreat as per rules section 11).
